Getting started
Overview of the settings that need to be configured first....
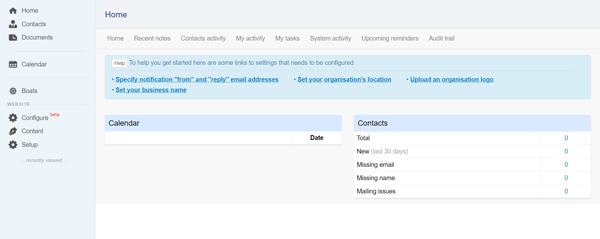
When you first register you will be presented with a window that looks like this:

It is important to set up the basic information such as email address and company logos.
1. Specify notification "from" and "reply" email addresses

On the dashboard click "Settings" in the top right hand corner, then "Notification Settings" in the links on the centre of the screen.
Add a name and email address for correspondences to go to and from. This can be the same address, but needs to be added to both boxes.
Once you've filled in the boxes click "Update".
2. Set your Organisation's Location

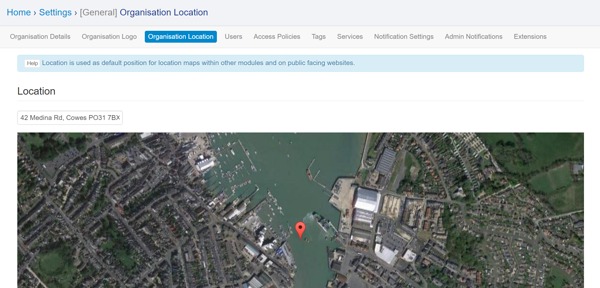
On the dashboard click "Settings" in the top right hand corner, then "Organisation Location" in the links on the centre of the screen.
Type in your organisations postcode or rough address
When happy with the location click "Update".
3. Upload an Organisation Logo

On the dashboard click "Settings" in the top right hand corner, then "Organisation Logo" in the links on the centre of the screen.
Click browse and select the logo you wish to use.
Once selected click "Update"
If at any time you wish to remove the logo and just use words then tick the "Remove" box followed by "Update".
4. Set your Business Name

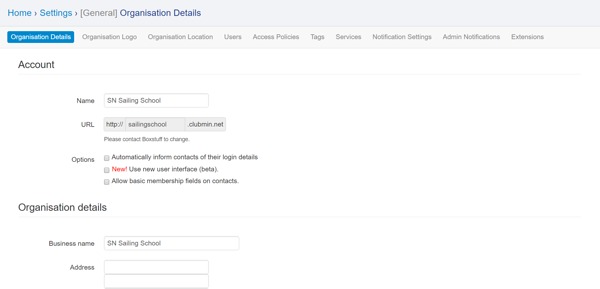
On the dashboard click "Settings" in the top right hand corner, then "Organisation Details" in the links on the centre of the screen.
Confirm your business name
If you wish to change the business domain then please contact boxstuff
We recommend you take the time to go through and quickly fill out the rest of the business information, such as phone number and address.
Last updated 10:10 on 24 November 2016
